How to Query Splunk using Tableau
This tutorial shows how to connect to Splunk with Tableau to perform data analysis.
Tableau makes it easy to query and visualize data from multiple sources. Splunk allows collecting, archiving, and analysis of data in real-time from applications, systems, and devices across the enterprise. Before Splunk version 7, it was possible to use the Splunk ODBC connector to retrieve data from Splunk. The Splunk ODBC connector is no longer supported. An alternative is using JDBC driver connections in Tableau that were introduced in Tableau 2018.3. The Splunk JDBC driver allows accessing Splunk data by Tableau. Setup instructions are below, and the Splunk solutions team produced an overview setup document.
Setup Instructions
- Verify Tableau Version
- Download and Install Splunk JDBC Driver
- Create a Data Source
- Extract Data and Perform Analysis
Verify Tableau Version
Verify that your Tableau version is at least Tableau 2018.3 that has JDBC driver support. Earlier versions do not support JDBC, so only the Splunk ODBC connector can be used. When adding a new data source, Other Databases (JDBC) should be available.

Download and Install Splunk JDBC Driver
Download the Splunk JDBC driver. The install file is UnityJDBC_Trial_Install.jar that can be unpacked by double-clicking on the file or running the command java -jar UnityJDBC_Trial_Install.jar. After the driver installation is complete, the installation folder will contain the file splunk_unityjdbc_full.jar. That file needs to be copied into the Tableau installation in the directory Tableau\Drivers (e..g. on Windows c:\Program Files\Tableau\Drivers). After this step is complete, restart Tableau. It is possible to test the connection to Splunk outside of Tableau using the SourceBuilder utility provided with the driver but that is not required.
Create a Data Source
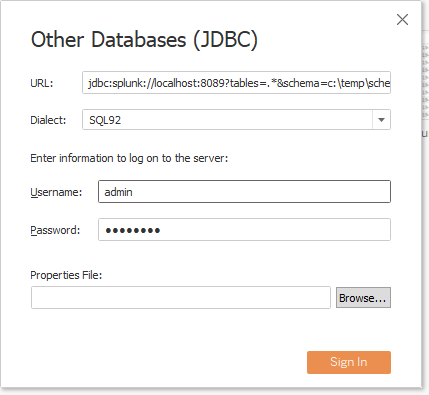
In Tableau, create a new data source as Other Databases (JDBC). The JDBC URL is jdbc:splunk://localhost:8089?tables=.*&schema=c:\temp\schema.xml
- Replace the host and port with your server information.
- The parameter
tables=.*is a regular expression extracting all saved searches in Splunk. For some large Splunk installations, building a schema for every saved search may take some time. It is possible to provide a comma-separated list of regular expressions to extract only certain searches, e.g.tables=search1,search2,n.*would extract searches namedsearch1,search2, and any searches that start with the letter n. - The parameter
schema=c:\temp\schema.xmlspecifies a location to store the schema information for the saved searches. This can be any location the user has write access to. The default is in the location where Tableau is installed (often theProgram Filesdirectory) which many users may not have permission to access. Select an appropriate directory. - The parameter
rebuildschema=truecan be added at any time to rebuild the schema file from saved searches. It is not recommended to have this parameter on all the time as a schema would be rebuilt every connection. - Other parameters are
debug=trueandlog=c:\temp\log.txtto turn on driver debugging and logging.
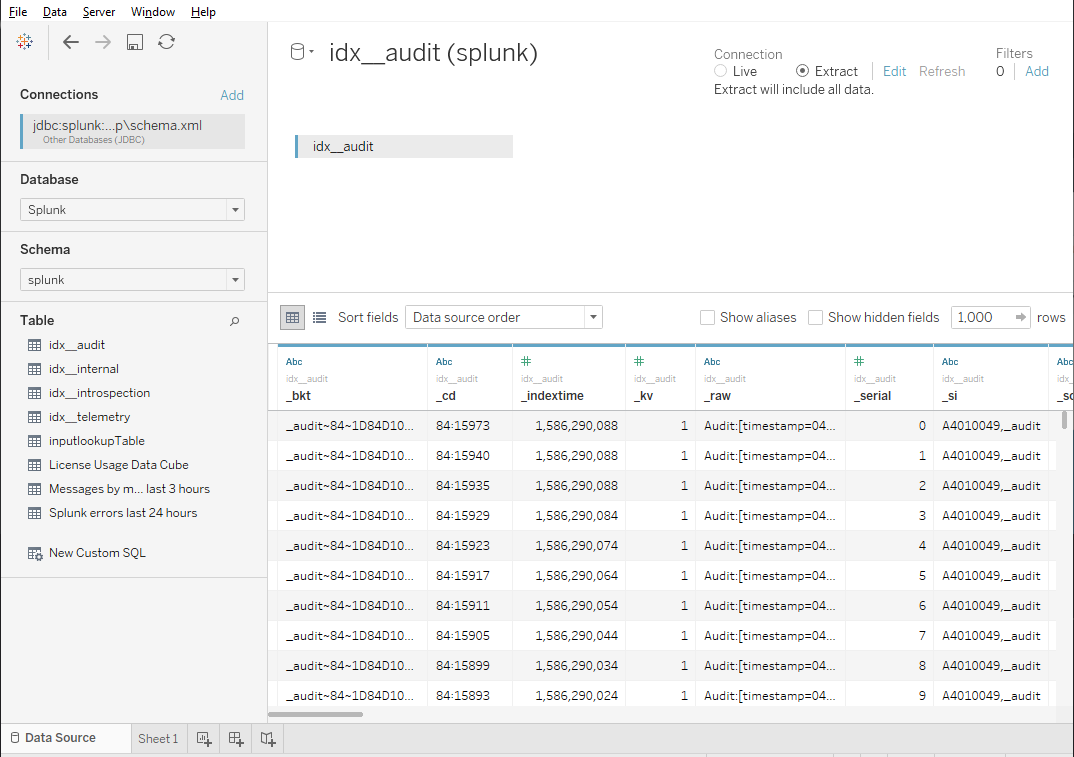
Extract Data and Perform Analysis
During the first connection, the driver will create a schema for any saved search and index that matches the extraction criteria. Once completed, each saved search will appear as a table to Tableau. Data can be extracted and analyzed with Tableau. The recommendation is to use query Extract rather than Live connections as Tableau may generate SQL that Splunk is unable to handle. Once the data set has been extracted, Tableau can be used as usual.